Step 1:
- Select Command Prompt(Admin) in your computer.
- Command: Windows key(
 ) + X
) + X

Step 2:
- Check whether your computer is supported for Hosted network or not. Type the following command in Command Prompt.
- Command : netsh wlan show drivers

If the result is “YES” then proceed to Step 3 or else download the required drivers from your vendor website.
Configuring the Hosted network connection:
Step 1:
- Type “netsh wlan set hostednetwork mode=allow ssid=yourname key=yourpassword” (enter the command without the quotations).
- Note: In this example, I have used my own user Name and Password. You can use your own parameters for SSID and KEY and Password must be greater than 8 digits.

You have successfully established the Network Connection.
Step 2:
- Start your hosted network.
- Command : netsh wlan start hostednetwork

When there is no error:

Sharing your Wireless Network Adapter
Step 1:
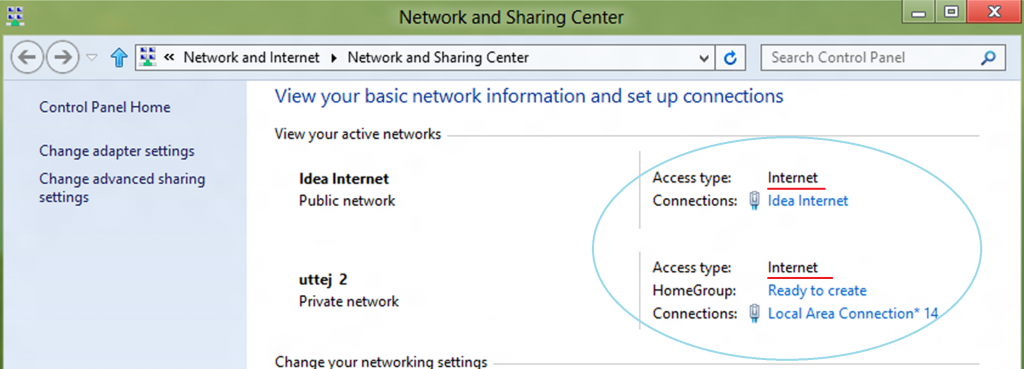
- Go to control Panel -> Network and Internet and select Network and Sharing Center.
Step 2:
- There you can see your newly created network under the original network connection.

Step 3:
- Select “Change adapter settings” in the left side column of Network and Sharing Center.
Step 4:
- Right click on your Wireless Network Adapter and select properties. Select the tab “Sharing“. Check the option “Allow other network users to connect through this internet’s connection” option. Mention your newly created hosted network name.

Step 5:
- Check whether your hosted network has shared the network access or not from the Network Sharing and Center.

- Wahoooo!! You have successfully turned on your WiFi Hotspot. Now you can surf internet from any device using the Hotspot.
- Here i’m going to connect my Mobile using the configured WiFi Hotspot.

- To stop the hosted network, type the command ” netsh wlan stop hostednetwork” in command prompt.
OK, i’m going to show you one trick so that you can Start/Stop your WiFi Hotspot in a single click.
Posted By Veersoni and Anil Haker


0 comments:
Post a Comment